

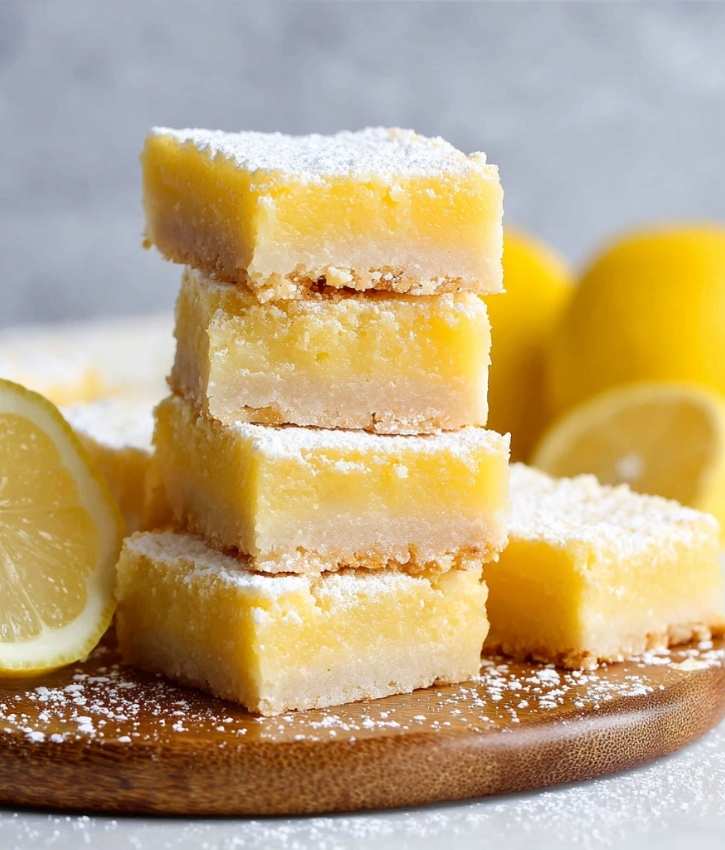
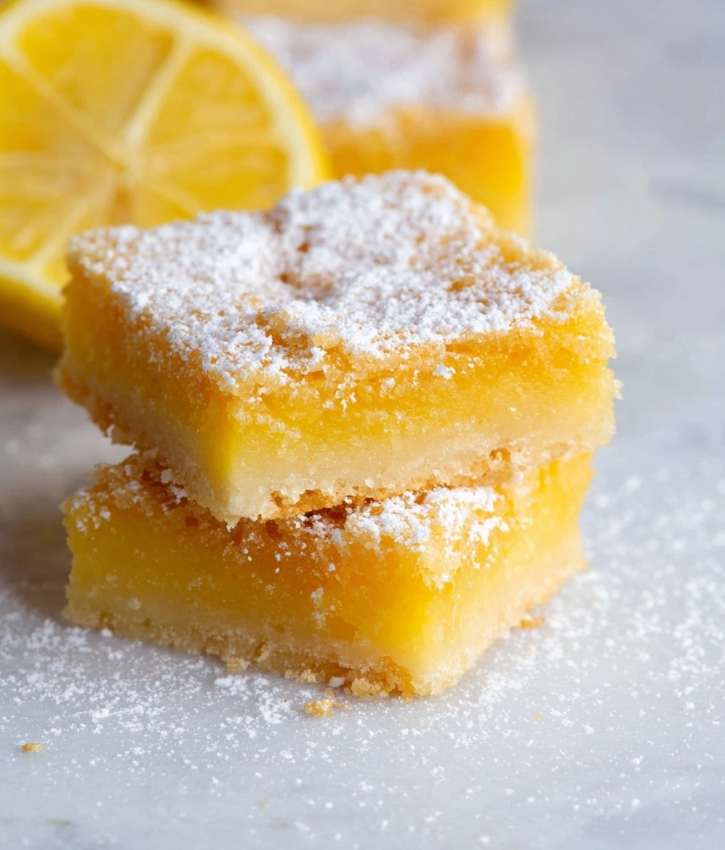
When I was pregnant, dessert cravings weren’t just “wants”—they were little anchors in the middle of emotional, ordinary days. Citrus became my reset button, and lemon bars were the kind of bright, buttery comfort I could count on: sharp, sunny filling on a rich shortbread base, dusted with that snowy powdered sugar that makes everything feel a little more special. This small-batch lemon bars recipe is for the days you want that bakery-style payoff without a full pan staring you down. A 4×4 pan gives you a handful of perfect squares—puckery, tender, and exactly the right amount of sweet.
Why these 4×4 lemon bars are worth making
If you like lemon bars that actually taste like lemon (not just “sweet yellow”), this batch delivers. You get lots of zest, enough juice to make you pucker, and a crust that leans sugar-cookie tender instead of plain, bland shortbread.
They’re also a great “small dessert, big impact” option for brunch spreads—especially next to something creamy like Blueberry Cheesecake Rolls or a light, crisp treat like Meringue Kisses.
Ingredients and the pan choices that actually work
This recipe is written for a 4×4-inch pan (thick, bakery-style bars). If you’d rather do a thinner layer, you can bake the same batter in a small loaf pan, or scale up for an 8×8.
A quick pan note: if you only have a metal pan, line it really well with parchment. Lemon filling is acidic, and parchment keeps everything tasting clean (and lifts out easily).
If lemon is your forever flavor, you’ll also want to bookmark my cozy Lemon Cream Cheese Dump Cake and the super-simple Lemon Oatmeal No-Bake Cookies for days you don’t want to turn on the oven.
What you’ll need
Shortbread crust
- 6 Tbsp cold unsalted butter (slightly cool, not fully softened)
- 1/4 cup powdered sugar, plus more for serving
- 3/4 cup all-purpose flour
- Pinch of salt
Lemon filling
- 1/2 cup granulated sugar
- 1 tsp packed lemon zest
- 3 Tbsp fresh lemon juice
- 1 large egg
- 1 large egg yolk (save the white for another use)
- 1/4 tsp baking powder
- 1 Tbsp all-purpose flour
How to make small batch lemon bars in a 4×4 pan
This recipe has two bakes: crust first, then filling. Don’t mix the filling early—lemon juice and eggs don’t love hanging out together too long.
1) Bake the crust
- Heat oven to 350°F. Line a 4×4 pan with parchment (leave overhang for lifting out).
- In a bowl, combine crust ingredients. Use your fingers or a pastry blender to rub the butter into the flour and sugar until you have a coarse, sandy mixture. It will feel dry at first—this is normal.
- Press firmly into the pan.
- Bake about 25 minutes, until the edges look lightly golden and the top doesn’t look wet.
2) Mix and bake the lemon layer
- As soon as the crust comes out, make the filling: whisk (or beat briefly) sugar, lemon juice, zest, egg, and yolk just until combined and lightly frothy—don’t whip aggressively.
- Whisk in baking powder and flour until smooth.
- Pour over the warm crust and return to the oven. Bake about 20–27 minutes (4×4 bars are thicker, so they may need the extra few minutes).
Doneness cue: the center should be set with only the slightest jiggle, and it shouldn’t hold a fingerprint.
Let cool, then chill if you want super clean slices.
If you’re building a citrusy dessert moment, these bars are gorgeous with something floral and creamy like Limoncello Tiramisu or a sweet bite that feels fancy without effort like Dubai Chocolate Covered Strawberries.
Serving, storage, and troubleshooting
How to serve
Slice into 4 squares (or smaller bites), and dust generously with powdered sugar. Lemon bars are best slightly chilled to room temp—that’s when the filling feels smooth and the crust stays crisp.
For a dessert table, these pair surprisingly well with cozy, fruity bakes like Apple Blossom Dessert or something rich and dramatic like Matcha Burnt Basque Cheesecake.
Storage
Store in an airtight container in the fridge up to 3 days. If stacking, place parchment between layers to prevent sticking.
Print Small Batch Lemon Bars (4×4 Pan)
- Total Time: 3 hours 20 minutes
- Yield: 8 squares
Ingredients
3/4 cup all-purpose flour
1/4 cup powdered sugar
1/4 teaspoon salt
6 tablespoons cold unsalted butter, cut into 6 pieces
Lemon Filling
1 whole egg, room temperature
1 egg yolk, room temperature
1/2 cup granulated sugar
1 tablespoon powdered sugar plus more for dusting
1 tablespoon all-purpose flour
1/4 teaspoon baking powder
1 teaspoon lemon zest
3 tablespoons fresh lemon juice (from 1-2 lemons)
Instructions
1. Preheat oven to 350F. Lightly grease a 9×5 loaf pan then line with parchment paper.
2. In the bowl of a large food processor, add the flour, sugar, and salt. 3. Add the cold butter and pulse until butter is finely cut into the flour and a dough forms, about 1-2 minutes. Resist adding any liquid. It’ll seem really powdery then eventually turn into a dough.
3. Alternatively you can add the ingredients to a bowl and use a pastry blender to make the dough.
4. Transfer the mixture to the loaf pan and pat evenly into the bottom. 6. Bake for 20-25 minutes or until golden brown on the edges.
5. Meanwhile, make the filling: In a large bowl, whisk together the egg, egg yolk, and both sugars until sugar dissolves and mixture looks pale yellow. Try not to whisk too much air into it. Whisk in the flour and baking powder then the lemon zest and juice.
6. Once the crust has finished baking, turn the temperature down to 325F. Give the filling one last whisk (it’ll be runny) then immediately pour over the hot crust and put back in the oven. Bake for 20-25 minutes or until set and golden brown (it may slightly wiggle but top should be solid when touched).
7. Cool in the pan for 30 minutes then carefully remove and transfer to a wire rack. Cool until room temperature.
8. Dust with powdered sugar then refrigerate for at least 2 hours. Cut into squares.
Store in an airtight container and refrigerate for up to 1 week.
- Prep Time: 30 minutes
- Cook Time: 50 minutes
Quick FAQ
How do I know they’re set?
Gently nudge the pan—center should wobble only slightly. It continues to set as it cools.
Why did my top crack?
Usually from over-mixing (too much air) or a drastic temperature swing. Mix gently, and cool on a rack before chilling.
Should the top brown?
No—pull them before they brown. Browning can mean the filling is overbaked.
Scaling notes (if you want more)
- 8×8 pan (double batch): Use the doubled ingredient amounts you provided in your base content and bake with similar cues for doneness.
- Loaf pan: This batter also works in a parchment-lined loaf pan for thicker “bakery” bars; bake times are similar, but always trust the jiggle test.
If you want, I can also rewrite this same post into a “print-style” version with a tighter recipe card layout while keeping the storytelling intro and internal links.