
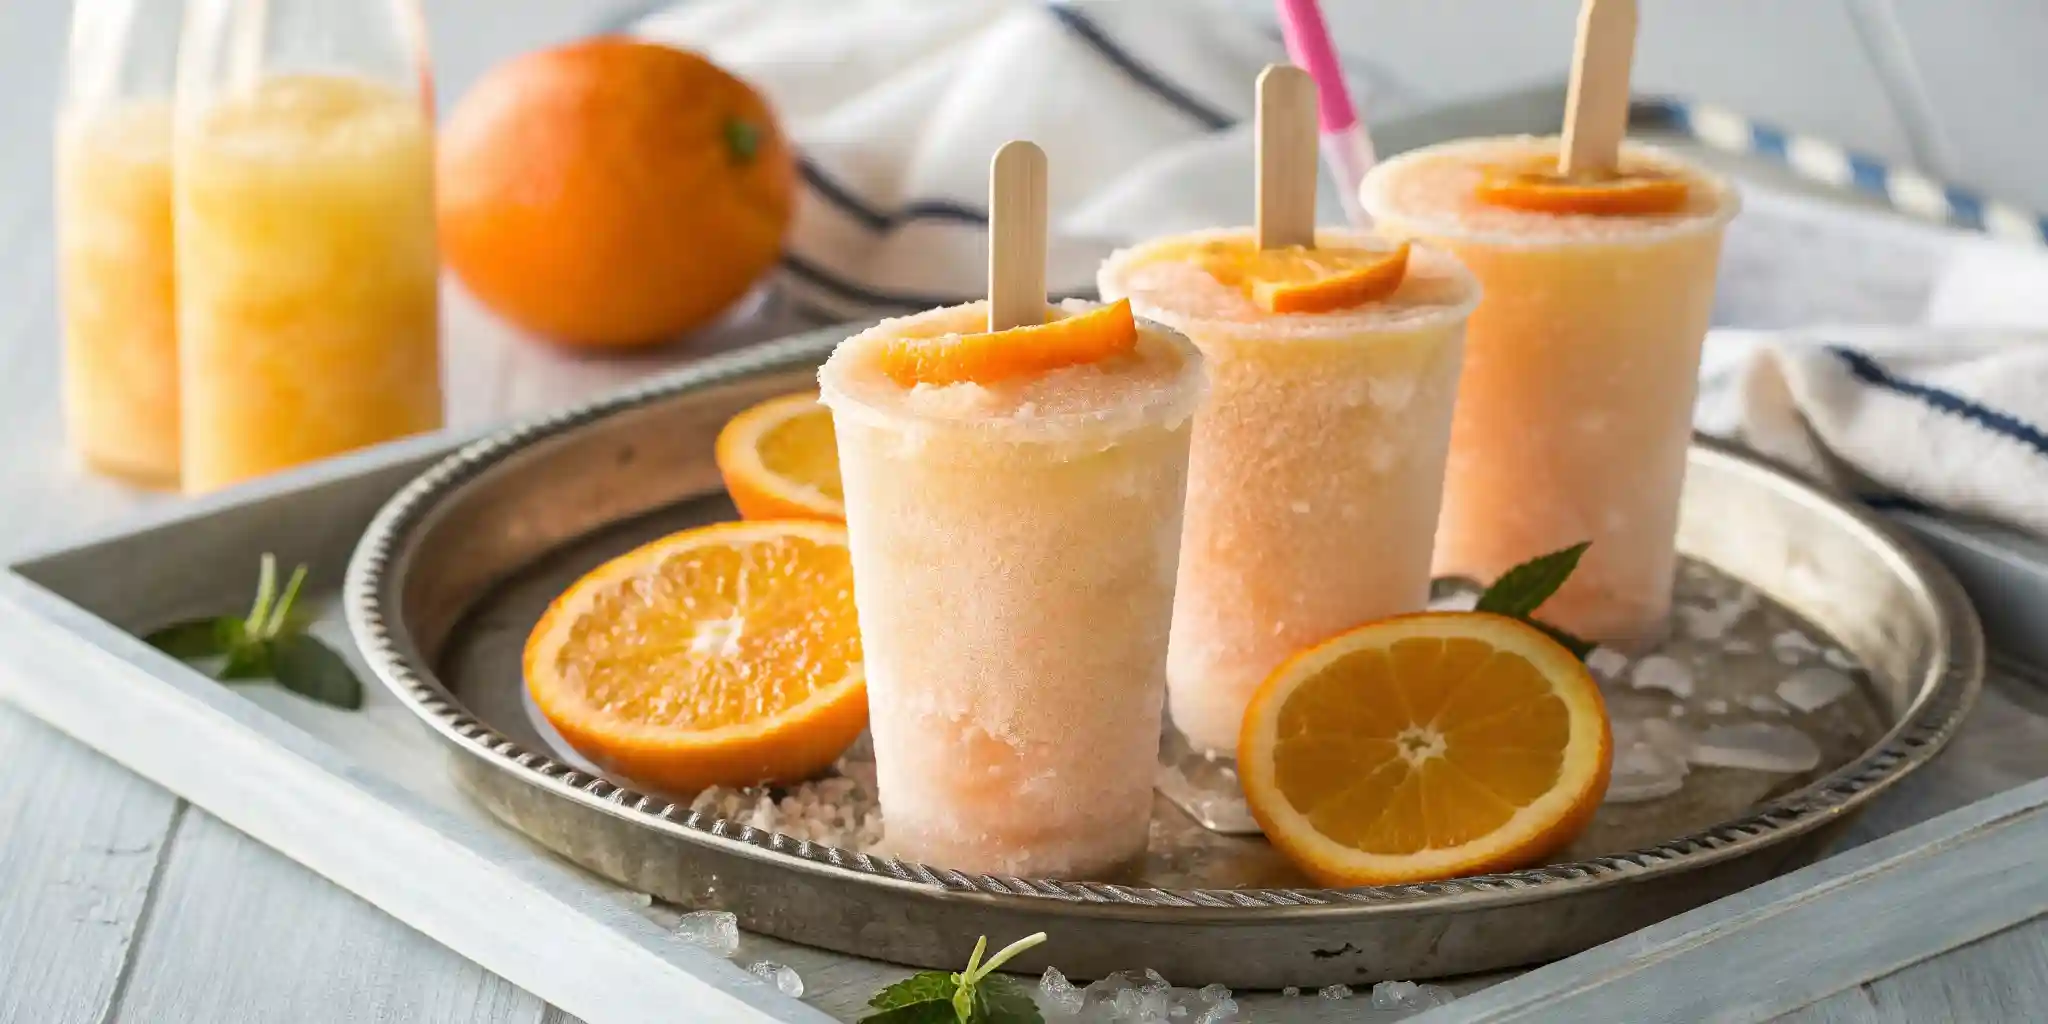
Push pop ice cream instantly takes me back to childhood summers—sticky fingers, slurping orange sherbet through a cardboard tube, and pure joy.
Hey, I’m Maya and let’s be honest, desserts are my love language. What started with a pregnancy craving for red velvet cake turned into a full-blown dessert obsession. Here at Not Just Recipe, I believe the best sweets aren’t just made in bowls—they’re made in memories.
So when I couldn’t find those neon orange push-up pops at the store anymore? I took matters (and a whisk) into my own hands.
In this post, I’ll show you how to make homemade orange sherbet push pop ice cream using just three ingredients. It’s fast, fun, and full of creamy nostalgia. Let’s get into it.
Table of Contents
What is Push Pop Ice Cream?
Understanding Push Pop Desserts vs. Regular Ice Cream
At first glance, push pop ice cream may look like a kid’s version of a regular scoop—but these frozen treats are so much more than that. Think of them as a hybrid between a popsicle and ice cream, with a twist: they come in a tube you push from the bottom to eat. The design makes them super easy to enjoy on the go without any spoons, cones, or mess.
Unlike traditional scooped ice cream stored in big tubs, push pops are pre-portioned, soft, airy, and refreshingly creamy—like a mix of sherbet and soft serve. Unlike hard popsicles, they stay soft thanks to their ingredients and storage.
What sets them apart is the creamy texture, fun tube packaging, and nostalgic vibe—you don’t just eat a push pop, you play with it.
Popular flavors range from classic orange sherbet to strawberry banana or tropical punch. Back then, we had Flintstones-themed tubes with fruity swirls. Today, homemade versions can be dairy-free or sugar-free too.
Old push pops came in cardboard tubes with push sticks. Now, reusable plastic molds make them leak-free and easy to clean. While classic ice cream hasn’t changed much, push pops mix retro fun with modern convenience.
Print
Push Pop Ice Cream
- Total Time: 6 hours
- Yield: 10 popsicles 1x
- Diet: Vegetarian
Description
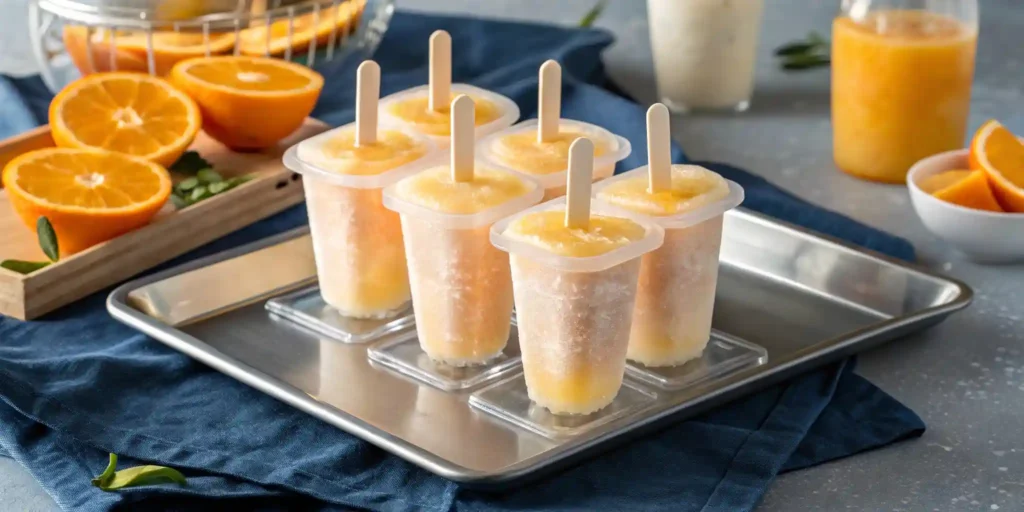
Homemade Orange Sherbet Push Up Pops are a creamy, citrusy blast from the past. Made with just three ingredients, this treat is both refreshing and incredibly easy to prepare—no ice cream maker required!
Ingredients
1 cup pineapple juice, chilled
3 cups orange soft drink, chilled
1 14-ounce can sweetened condensed milk
Instructions
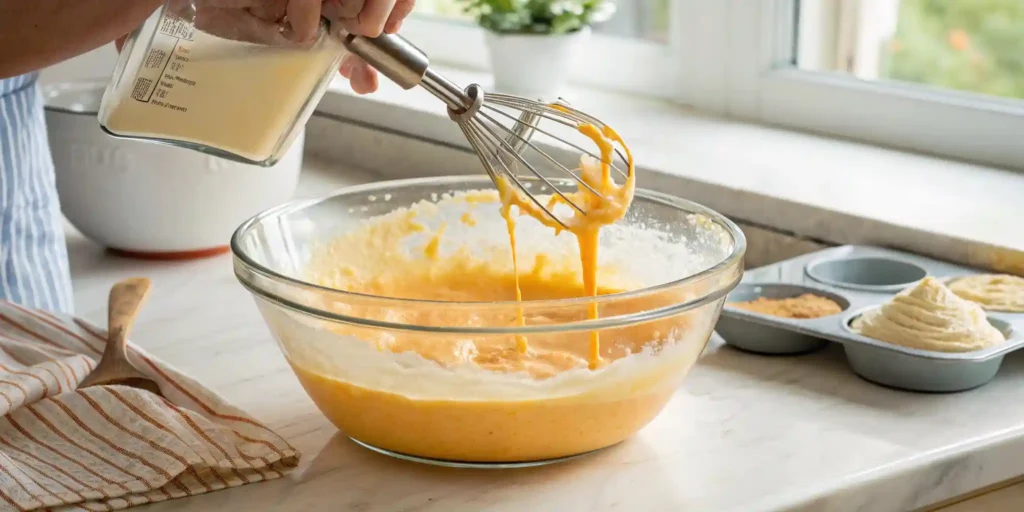
1. In a large mixing bowl, combine all ingredients and stir until fully blended.
2. If using an ice cream maker, pour in the mixture and process according to the manufacturer’s instructions.
3. If not using an ice cream maker, pour the mixture into a freezer-safe casserole dish.
4. Freeze for 1 hour, then stir. Repeat every 2 hours, stirring, until a soft-serve consistency is achieved (about 6–8 hours total).
5. While the mixture is still soft, carefully spoon or pour into push pop molds.
6. Freeze upright for several hours until fully solid.
Notes
Once fully frozen, the push up pops can be stored flat in the freezer.
For best texture and flavor, consume within three months.
Great for summer parties, picnics, or nostalgic dessert moments.
- Prep Time: 15 minutes
- Cook Time: 0 minutes
- Category: Dessert
- Method: Freeze
- Cuisine: American
Nutrition
- Serving Size: 1 popsicle
- Calories: 70
- Sugar: 12g
- Sodium: 15mg
- Fat: 1.5g
- Saturated Fat: 1g
- Unsaturated Fat: 0.5g
- Trans Fat: 0g
- Carbohydrates: 16g
- Fiber: 0g
- Protein: 1g
- Cholesterol: 2.5mg
Keywords: orange sherbet, push up pops, orange popsicles, homemade frozen treats
Ingredients in Push Pop Ice Cream
Classic Ingredients: From Commercial to Homemade
Whether you’re buying them or making your own, the ingredients in push pop ice cream are what give it that signature creamy-yet-light texture. Unlike traditional ice cream loaded with eggs and heavy cream, push pops are often simpler and more refreshing—perfect for hot days or quick treats.
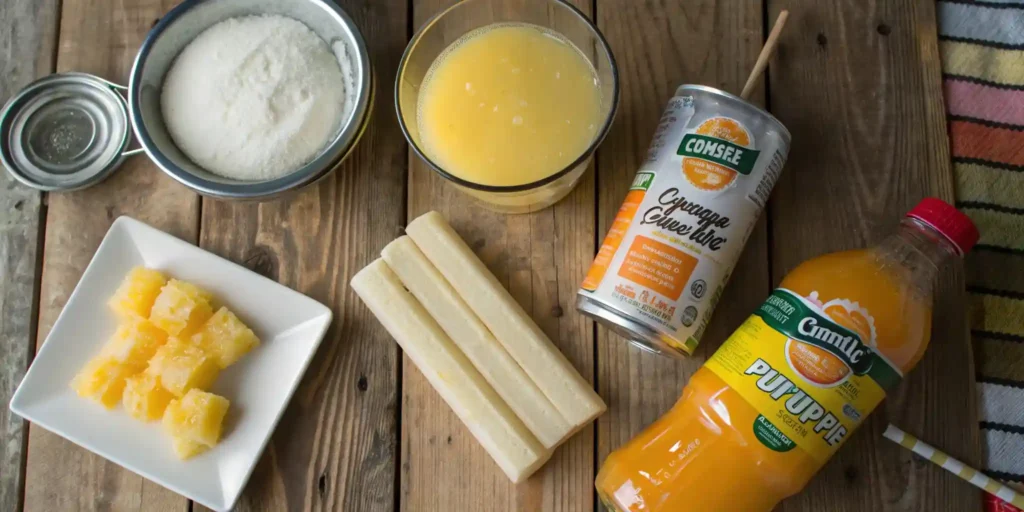
The original store-bought versions leaned heavily on artificial flavoring and stabilizers to create that smooth, never-rock-solid texture. But the homemade route? That’s where things get fun—and surprisingly easy. You only need three ingredients to recreate the orange sherbet version:
- Pineapple juice (adds brightness and acidity)
- Orange soda (for fizz and flavor)
- Sweetened condensed milk (the real MVP for creaminess)
This trio creates a creamy base that mimics the texture of soft-serve ice cream without requiring fancy emulsifiers or stabilizers. The citrus gives it a tangy pop, while the condensed milk balances it with rich sweetness.
This simple ingredient combo also makes it easy to customize your own push pop ice cream at home. Swap the soda for lemon-lime or even strawberry soda. Use mango nectar instead of pineapple juice. You can even go dairy-free with coconut cream in place of condensed milk.
Making It Creamy: How Pineapple Juice, Soda & Condensed Milk Work Together
The genius of homemade push pop ice cream lies in the chemistry of these three ingredients. Pineapple juice contains natural acids that brighten the flavor and help break down proteins in the milk for a smoother texture. The orange soda introduces carbonation, which adds lightness and a tiny bit of froth during the mixing process.
It acts like a shortcut to an ice cream base—rich, thick, and sweet—all without having to heat a custard or use an ice cream stabilizer. Plus, it freezes better than regular milk, preventing those unwanted ice crystals from forming.
The result? A creamy, scoopable treat that holds its shape in a push-up mold and melts smoothly in your mouth. No ice cream machine? No problem. These ingredients still work beautifully with a freezer method too.
So the next time someone asks what’s in push pop ice cream, you can tell them: just three simple things, one big dose of nostalgia, and zero mystery ingredients.
Tools and Equipment Needed
Push Pop Molds vs. Classic Cardboard Tubes
If you’re serious about making push pop ice cream at home, one of the most important things you’ll need is the right mold. Back in the day, those cardboard tubes wrapped in colorful paper were all we had—and as fun as they were, they weren’t the most practical. Soggy bottoms, sticky hands, and constant leaks? Yeah, no thanks.
Today’s version is a big upgrade. Enter: reusable plastic push pop molds. These handy containers are easy to fill, stand upright in the freezer, and make cleanup a breeze. You can find them online in packs, often labeled as “cake pop shooters” or “ice cream push-up molds.” Most even come with built-in sticks and lids, so you’re ready to freeze and serve in one go.
Still feeling nostalgic? Some crafters even DIY their own cardboard-style versions for that old-school feel, but honestly, the modern molds are more durable and far less messy.
Ice Cream Maker vs. Freezer Method: Which One Should You Use?
Here’s the good news: you don’t need a fancy machine to make great push pop ice cream. But if you have an ice cream maker, it can speed things up and create an even creamier texture.
With an ice cream maker, the chilled mixture is churned continuously, which adds air and prevents large ice crystals from forming. The result? A silky, soft-serve texture that’s perfect for spooning into molds. Just make sure your machine’s bowl is fully frozen before you start!
Don’t have a machine? No worries. The freezer method works just as well with a bit more patience. After mixing your ingredients, pour them into a shallow dish and freeze. Every hour or so, stir it with a spoon or fork to break up crystals until the texture becomes soft and fluffy. It’s a low-tech method, but it gets the job done—and still delivers that classic push pop ice cream creaminess.
Whether you go high-tech or no-tech, the secret is in how you handle the freezing process. Keep the mixture cold, mix it thoroughly, and freeze it standing upright. That’s how you get that nostalgic push-and-eat experience right from your own freezer.
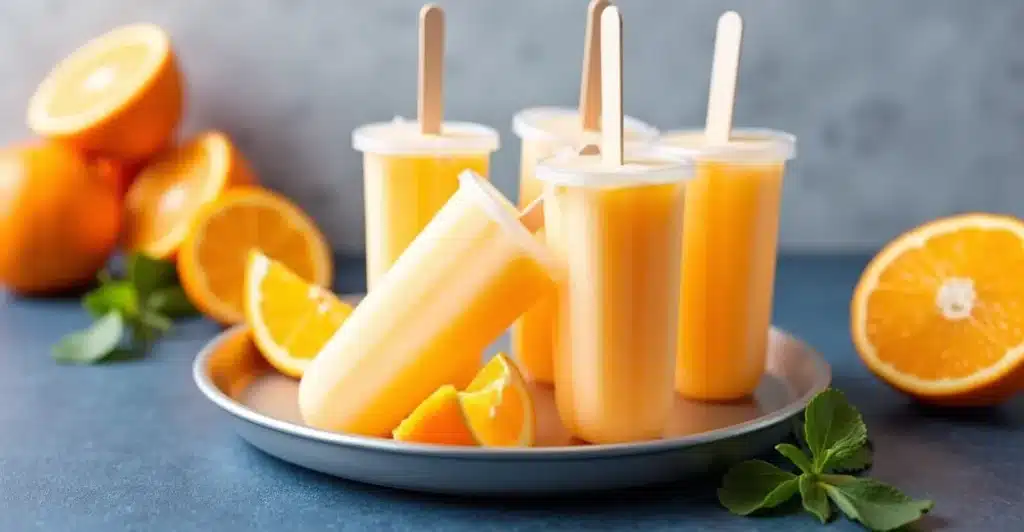
Creamy Orange Push Pops – A 3-Ingredient Frozen Throwback
Bring back the summer vibes with these dreamy orange push pops made right in your kitchen. Inspired by the classic sherbet treats we all loved as kids, this homemade version uses only three simple ingredients to create a smooth, citrusy dessert you’ll want to keep stocked in your freezer.
Ingredients:
1 cup chilled pineapple juice
3 cups cold orange soda
1 (14 oz) can of sweetened condensed milk
The result? A velvety blend with a fizzy brightness and just the right touch of tropical sweetness.
How to Make Orange Push Pops (With or Without Equipment)
🚀 Using an Ice Cream Maker:
1 .Mix It Up: In a large bowl, blend the juice, soda, and condensed milk until silky.
Churn It: Pour into your pre-frozen ice cream maker and churn for 30–35 minutes, or until soft and thick.
Mold It: Spoon the mixture into push pop molds. Tap lightly to eliminate any air pockets.
Freeze Time: Stand them upright and freeze until solid—about 6 to 8 hours.
🧊 No Ice Cream Maker? No Problem!
Whisk the Base: Stir everything together in a bowl until smooth.
Initial Chill: Transfer to a wide, shallow dish and freeze for 60 minutes.
Stir & Freeze Again: Mix thoroughly to break up ice crystals. Repeat every hour for 3–4 hours.
Final Set: Scoop the slushy mix into molds and freeze upright until firm.
Customize It!
For a twist, swap in lemon-lime soda or blend in a bit of vanilla for a nostalgic creamsicle flair.
Tips for Ultra-Creamy Popsicles
The Secret to Creamy Pops: Avoiding Ice Crystals
There’s nothing worse than biting into what you thought was creamy push pop ice cream and instead getting a mouthful of icy crunch. The texture is everything when it comes to these nostalgic treats, and the key to keeping them creamy is all in the freezing process.
Here’s how to beat the ice crystal curse:
- Chill your ingredients: Starting with cold pineapple juice, orange soda, and condensed milk helps the mixture freeze faster, which reduces the time ice crystals have to form.
- Whisk thoroughly: Make sure your base is well mixed before freezing. You want an even distribution of sugar and fat to help maintain a smooth texture.
- Use small batches: If you’re using an ice cream maker, don’t overfill the bowl. Processing in smaller batches ensures better aeration and a fluffier final result.
When you follow these steps, your push pop ice cream will turn out soft, scoopable, and smooth—never gritty or icy.
Freezing, Storing & Textural Best Practices
How you freeze and store your homemade pops is just as important as how you mix them.
To keep your pops creamy and mess-free:
- Freeze upright: Always let the pops freeze in a vertical position. This keeps the filling level and prevents leaks.
- Avoid overfreezing: Leaving your push pops in the freezer for months may cause texture breakdown. While they can technically last up to three months, they’re best enjoyed within the first few weeks.
- Seal properly: Use molds with lids or cover the tops with plastic wrap. This keeps freezer burn away and preserves that velvety texture.
And here’s a bonus trick: If your pops have been in the freezer for a while, let them sit at room temp for 2–3 minutes before serving. This softens them just enough to bring back that original push-pop feel.
Homemade push pop ice cream can absolutely rival anything store-bought—if not exceed it—when you pay attention to the little details.
Fun Variations and Flavors to Try
Strawberry Yogurt, Tropical, Chocolate Banana & More
One of the best things about making push pop ice cream at home is how easy it is to experiment. Once you’ve nailed the base recipe, the flavor possibilities are endless. Whether you’re going for fruity, creamy, or chocolatey, you can create a pop that suits your mood—or the contents of your fridge.
Here are some fun and easy variations to try:
- Strawberry Yogurt Push Pops: Blend fresh strawberries with vanilla yogurt and honey. This version is creamy, slightly tart, and perfect for breakfast or snack time.
- Tropical Sunset: Mix mango juice, pineapple chunks, and coconut cream for a beachy, refreshing twist. Add a splash of lime juice to brighten it up.
- Chocolate Banana Cream: Blend bananas, cocoa powder, and a bit of sweetened condensed milk. This one tastes like a frozen chocolate milkshake.
- Blueberry Lemonade Sherbet: Use blueberry juice or purée mixed with lemon soda and a little cream. Sweet and tangy in all the right ways.
These flavors all stick to the same creamy-texture formula that makes push pop ice cream so unique—they’re smooth, not icy, and full of nostalgic flair with a fresh twist.
Kid-Friendly and Grown-Up Push Pop Ideas
These frozen treats are great for kids’ parties, after-school snacks, or even late-night sweet cravings. Want to make them extra fun for the little ones? Try layering two flavors—like orange and raspberry—or adding sprinkles right into the mold.
Feeling fancy? Grown-ups can turn push pop ice cream into a dessert cocktail by adding a splash of alcohol (like rum or orange liqueur) to the mix before freezing. Just keep those labeled and far from the kids’ side of the freezer.
You can also experiment with texture:
- Add cookie crumbs between layers.
- Swirl in fudge or fruit purée.
- Mix in tiny bits of candy for a surprise crunch.
Making push pop ice cream isn’t just about reliving childhood—it’s about making new memories, your way. The mold is your canvas. The freezer is your stage. Go create something cool.
Storage Tips & Shelf Life for Homemade Push Pop Ice Cream
How Long Do They Last in the Freezer?
One of the biggest perks of homemade push pop ice cream is how freezer-friendly it is—assuming you can keep your crew from devouring them all immediately. When stored correctly, these creamy treats can last up to three months in the freezer. However, for peak flavor and the best texture, it’s ideal to enjoy them within the first 2 to 4 weeks.
Why the time limit? Over time, even well-sealed push pops may start to develop freezer burn or lose their smooth consistency, becoming more icy than creamy. If you’re aiming for that perfect bite every time, plan to finish them within a month.
That said, if your batch disappears in just a few days—you’re clearly doing something right!
Smart Storage Tips for Maximum Freshness
Keeping your push pop ice cream delicious means storing them the right way. Here’s how to protect flavor, texture, and shape during freezing:
- Opt for lidded molds: Many modern molds come with built-in lids that help prevent ice crystals from forming and lock in freshness.
- Freeze upright: Standing them up while freezing preserves their shape and stops messy leaks. Try nestling them in tall jars or between freezer racks.
- Bag them up: Once frozen solid, place your pops in a large, zip-top freezer bag. This extra layer keeps them organized and adds protection against freezer air.
- Label for clarity: Made multiple flavors? Use masking tape and a marker to avoid flavor mix-ups later on.
- No molds? No problem: If you’re freezing the sherbet without molds, store it in a sealed, freezer-safe container or loaf pan wrapped tightly with plastic wrap. It’ll stay smooth and delicious for weeks.
Homemade push pops aren’t just a summer indulgence—they’re a make-ahead dessert you can keep on hand year-round. With these simple storage hacks, your frozen creations will always be ready when the craving kicks in.
Conclusion
There’s just something magical about push pop ice cream—a mix of nostalgia, flavor, and pure fun that never goes out of style. Whether you grew up on Flintstones-branded pops or discovered them later in life, the joy of that first creamy bite, the gentle push from the bottom, and the refreshing burst of fruity flavor is hard to forget.
The best part? You don’t have to rely on grocery store surprises anymore. With just a few ingredients and a little freezer space, you can bring this classic treat back to life in your own kitchen. And better yet, you can make it exactly how you like it—more creamy, less sweet, totally dairy-free, or wild with flavor variations.
Making push pop ice cream at home isn’t just about saving a trip to the store—it’s about creating new moments with old-school charm. Whether you’re handing them out at a summer party or sneaking one late at night (we won’t tell), they’re guaranteed to make people smile.
Looking for inspiration? Try a bold flavor twist with something new like our Ninja Creami Coffee Ice Cream—a rich, adult take on frozen treats that still feels playful and satisfying.
So go ahead—stock those molds, freeze a batch, and bring the joy of push pop ice cream home again.
So go ahead—stock those molds, freeze a batch, and bring the joy of push pop ice cream home again.
What are the ingredients in push pop ice cream?
Traditionally, push pop ice cream includes a simple blend of sweet and creamy components. Commercial versions often use dairy, fruit flavoring, sugar, and stabilizers. But the homemade version? It’s even simpler—and tastier. Our three-ingredient recipe uses pineapple juice, orange soda, and sweetened condensed milk. These combine to create a creamy, soft texture that’s light, fruity, and perfectly scoopable. No artificial stuff needed.
What is the secret to making ice cream very creamy?
The real secret to getting ultra-creamy push pop ice cream is the balance of fat, sugar, and how you freeze it. Sweetened condensed milk brings in the creaminess by adding both fat and sugar in one ingredient. Starting with chilled ingredients and either churning with an ice cream maker or manually stirring during freezing helps prevent large ice crystals from forming. That means a smoother, softer bite every time.
Did they stop making push-pop ice cream?
For the most part, yes—push pop ice cream in its original commercial form has largely disappeared from grocery store shelves. You might spot a Scooby-Doo version here or there, but it’s rare. The good news? You can recreate that nostalgic treat at home, minus the soggy cardboard tubes and hard-to-find branding. Homemade versions not only taste better but also let you customize your flavors and ingredients.
How to make popsicles creamy and not icy?
If you’re aiming for creamy over crunchy, focus on adding the right ingredients. A bit of fat—like condensed milk, yogurt, or even coconut milk—helps bind water and prevent ice crystal formation. Stirring your mixture during the freezing process or using an ice cream maker adds air and smoothness. With push pop ice cream, using sweetened liquids and proper chilling techniques keeps that creamy texture locked in.
Did this dessert happen in your kitchen?
There are no reviews yet. Be the first one to write one.