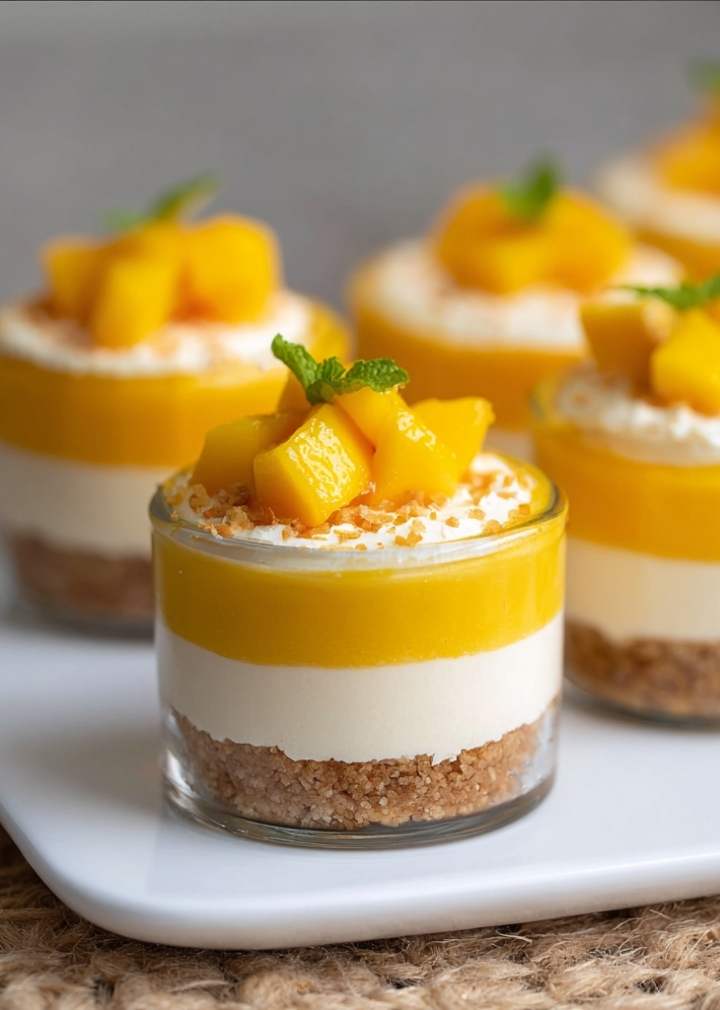
Description
Mango Ice Cream meets cheesecake in these creamy, delicious and very easy to make No Bake Mango Cheesecake Cups!
Ingredients
Crust :
150g Nilla wafers (about 40 wafers)
40g unsalted butter, melted (3 tbsp) *see notes
Mango cheesecake filling :
2 tbsp cold water + 2 tsp gelatin powder *see notes
2 blocks room temperature cream cheese (16 oz or 450g)
½ tsp vanilla
2–4 tablespoon sugar (to taste, depending on sweetness of mangoes)
¾ cup mango pulp, strained (170g) *see notes
½ cup heavy cream, chilled (120g)
Decoration :
¾ cup mango pulp (170g)
½ cup heavy cream, whipped
1–2 mangoes, chopped into small cubes
Instructions
Crust :
Blitz the Nilla wafers in your food processor until they form a fine crumb. Add the melted butter and gently mix
Divide the crumbs evenly between the dessert cups. Lightly press them down using the bottom of a thinner glass. You don’t want the crust to be packed too tightly, as that can make it hard to break it with a spoon when eating out of a dessert cup
Place the cups in the fridge while you work on the filling
Mango cheesecake filling :
Add 2 tablespoon cold water to a small bowl or a glass, and sprinkle over 2 teaspoon of gelatin powder. Place in the fridge for 5-10 minutes while you work on the filling
Add the cream cheese, sugar and vanilla to a large bowl. Use an electric hand mixer to whisk on medium speed for 2-3 minutes until the mixture is creamy, making sure to scrape the edges and bottom of the bowl with a rubber spatula halfway through
Strain in the mango pulp and whisk again until just combined. Do not overmix
Remove the gelatin from the fridge and stir. It should be clumpy / firm. Microwave it for ~10-15 seconds until it warms up and the gelatin dissolves in the water
Add the dissolved gelatin to the cheesecake filling and whisk on low speed until just combined
In a separate bowl, add the chilled heavy cream. Whisk on high speed until the cream reaches stiff peaks
Add the whipped cream to the cheesecake filling, and use a rubber spatula to gently fold it in until just combined. At this point, you should have a light and fluffy cheesecake batter
Divide the batter evenly between the cups with the crust inside, and tap them so the filling spreads out evenly
Place in the fridge overnight to set (at least 6 hours recommended)
Decoration :
When you are ready to serve, add 1-2 tablespoon of mango pulp on top of each cheesecake cup, and tilt the cups to spread it out
Whip cold heavy cream until it forms stiff peaks. Transfer to a piping bag with any piping tip you like, and pipe onto the cheesecake cups
Cut a mango into small cubes and place them on top of the cups
Serve and enjoy!
Notes
If you’re looking to customize your mango cheesecake, here are some easy ways to adapt the recipe without losing any of its deliciousness.
Crust Alternatives:
You can skip the butter in the crust and simply use a crumb base instead. For this method, it’s best to double the amount of Nilla wafers. To create a parfait-style dessert, layer two portions of the crushed biscuits with two layers of cheesecake filling in each cup. This approach gives you a mango cheesecake parfait that’s just as tasty as the classic version.
Gelatin and Texture Adjustments:
The amount of gelatin you use will determine the final texture of your cheesecake. Blooming 2 teaspoons of gelatin in 2 tablespoons of water will give you a soft-set consistency, rather than a firm set. If you prefer a creamier filling, you can leave out the gelatin entirely. For a firmer set, you could double both the gelatin and water, but I don’t recommend this as it may affect the dessert’s delicate texture.
Choosing Mango Pulp:
When it comes to the mango layer, you have two great options. If you have access to quality fresh mangoes, blend the flesh and strain it to make your own pulp. If not, canned Kesar mango pulp is an excellent alternative and works beautifully in this recipe.
For more tips on achieving blog post above.
- Prep Time: 30 minutes